If you write Scala in a Java-centric environment, chances are you might wind up with a Maven project, defined in a pom.xml. While this can work, it brings a few extra caveats if you want to submit your project to Maven Central (aka Sonatype OSSRH).
Step 1: Claim your Group ID
When you first publish something to the Sonatype OSSRH, you have to
The first question that is usually asked in the ticket is
Do you own the domain [your group id]? If not, please read: http://central.sonatype.org/pages/choosing-your-coordinates.html
You can speed up the process by stating that you do own it in the description. Here is an example: https://issues.sonatype.org/browse/OSSRH-34281
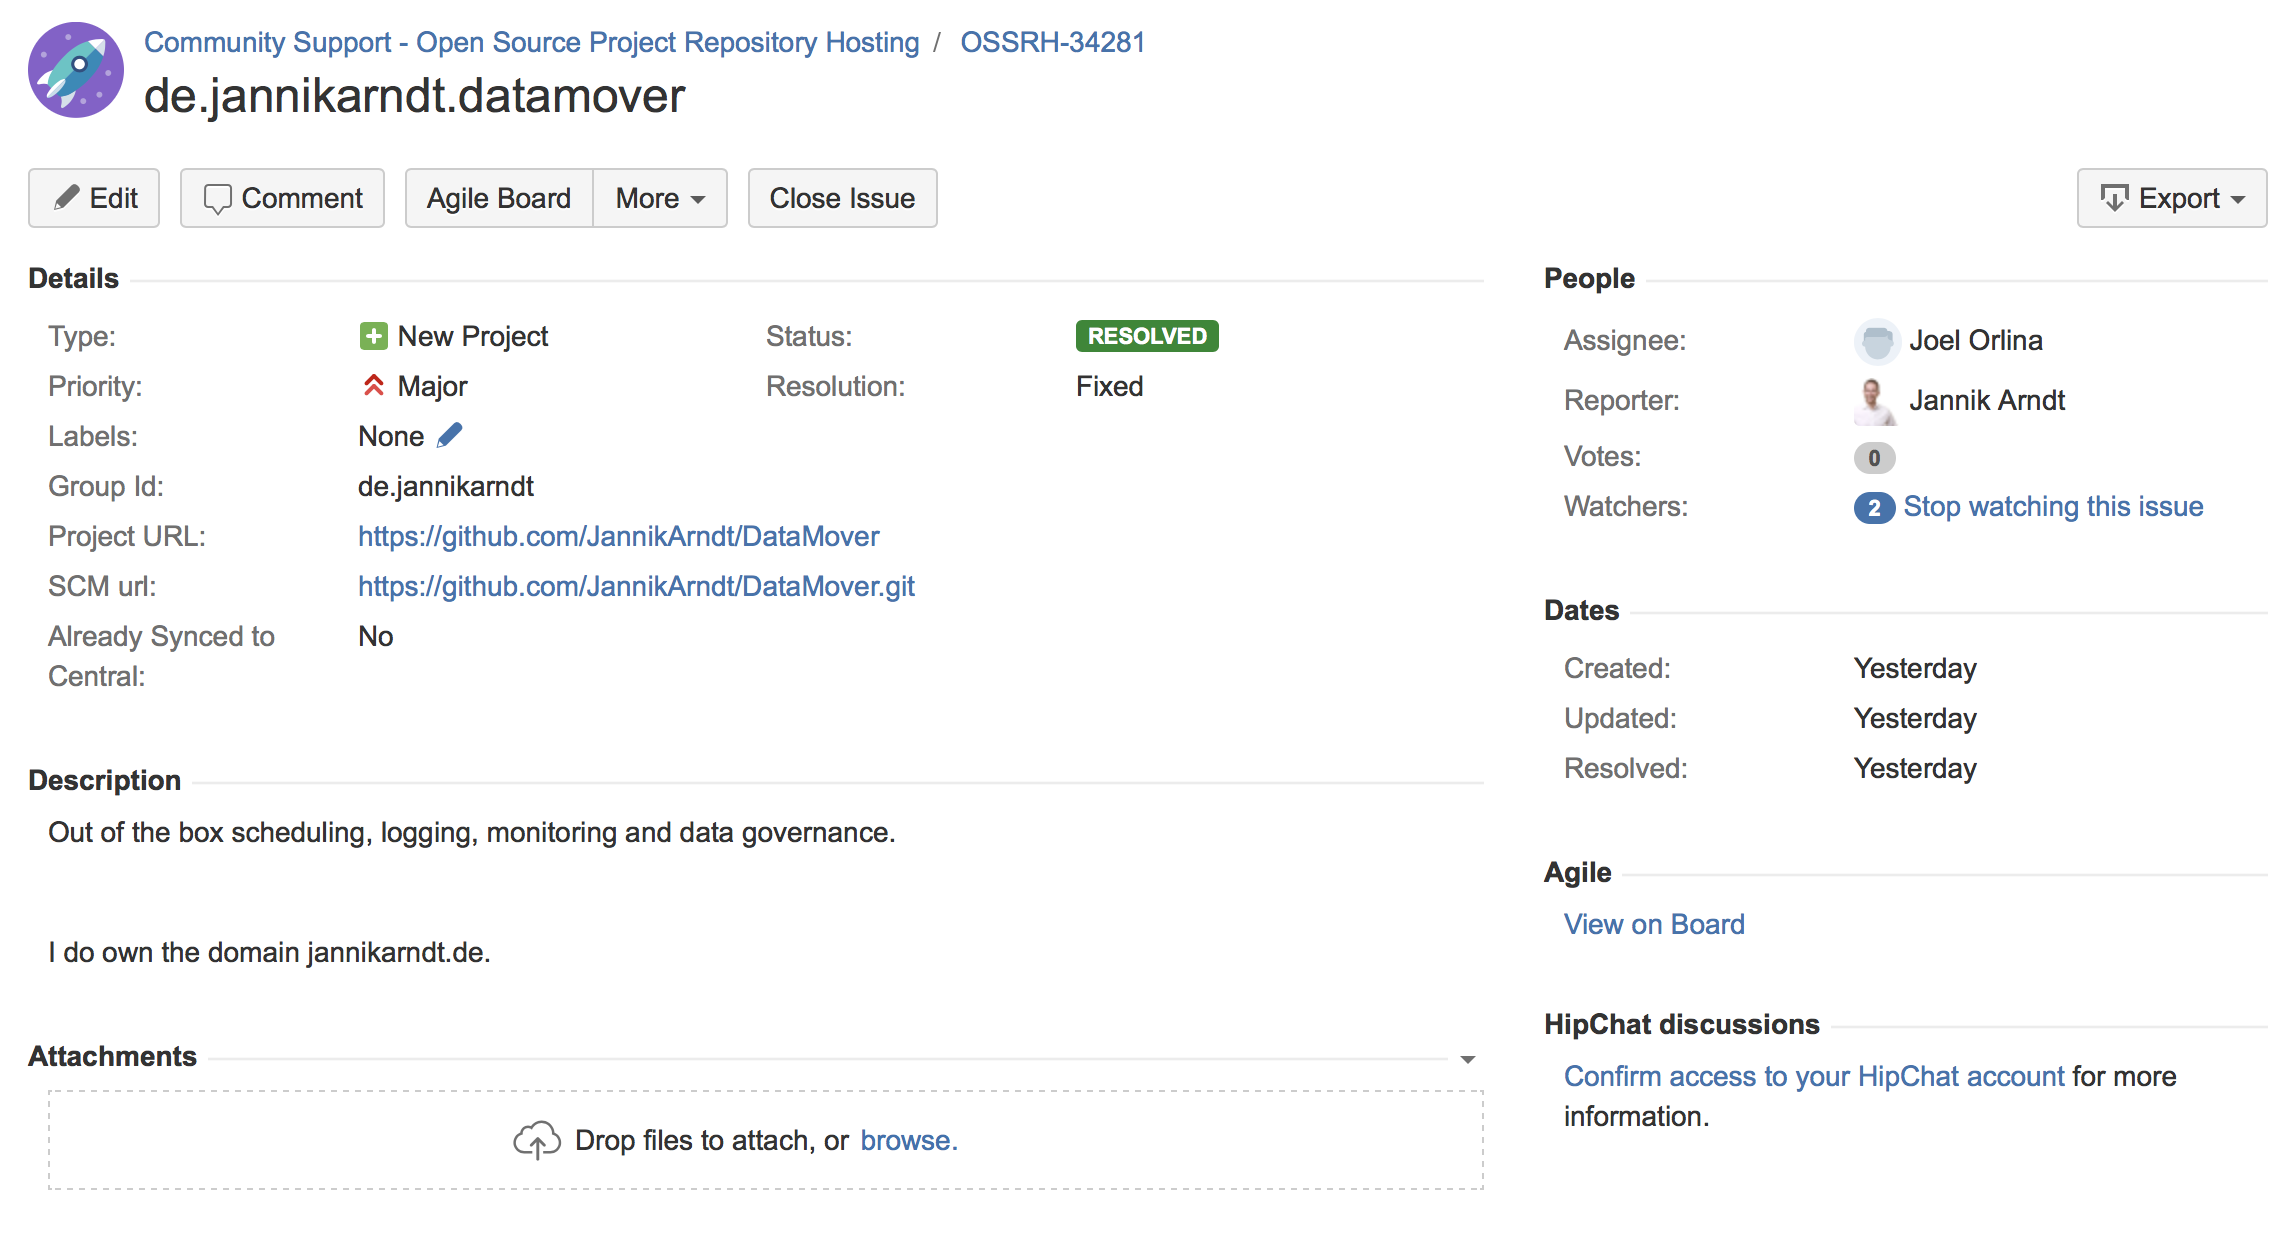
About three minutes (or up to 2 business days) later, you have your own repository!
Step 2: Deploy your first Snapshot
This is a condensed version of the official doc.
All you need to deploy your first snapshot is to
- add the snapshot repository to the
distributionManagementsection of yourpom.xml:
    <distributionManagement>
      <snapshotRepository>
        <id>ossrh</id>
        <url>https://oss.sonatype.org/content/repositories/snapshots</url>
      </snapshotRepository>
    </distributionManagement>
- add the
nexus-staging-maven-pluginto yourpom.xml:
    <build>
      <plugins>
        <plugin>
          <groupId>org.sonatype.plugins</groupId>
          <artifactId>nexus-staging-maven-plugin</artifactId>
          <version>1.6.7</version>
          <extensions>true</extensions>
          <configuration>
            <serverId>ossrh</serverId>
            <nexusUrl>https://oss.sonatype.org/</nexusUrl>
            <autoReleaseAfterClose>true</autoReleaseAfterClose>
          </configuration>
        </plugin>
        ...
      </plugins>
    </build>
- add your credentials to your
settings.xml(on macOS in~/.m2/settings.xml):
    <settings>
      <servers>
        <server>
          <id>ossrh</id>
          <username>your-jira-id</username>
          <password>your-jira-pwd</password>
        </server>
      </servers>
    </settings>
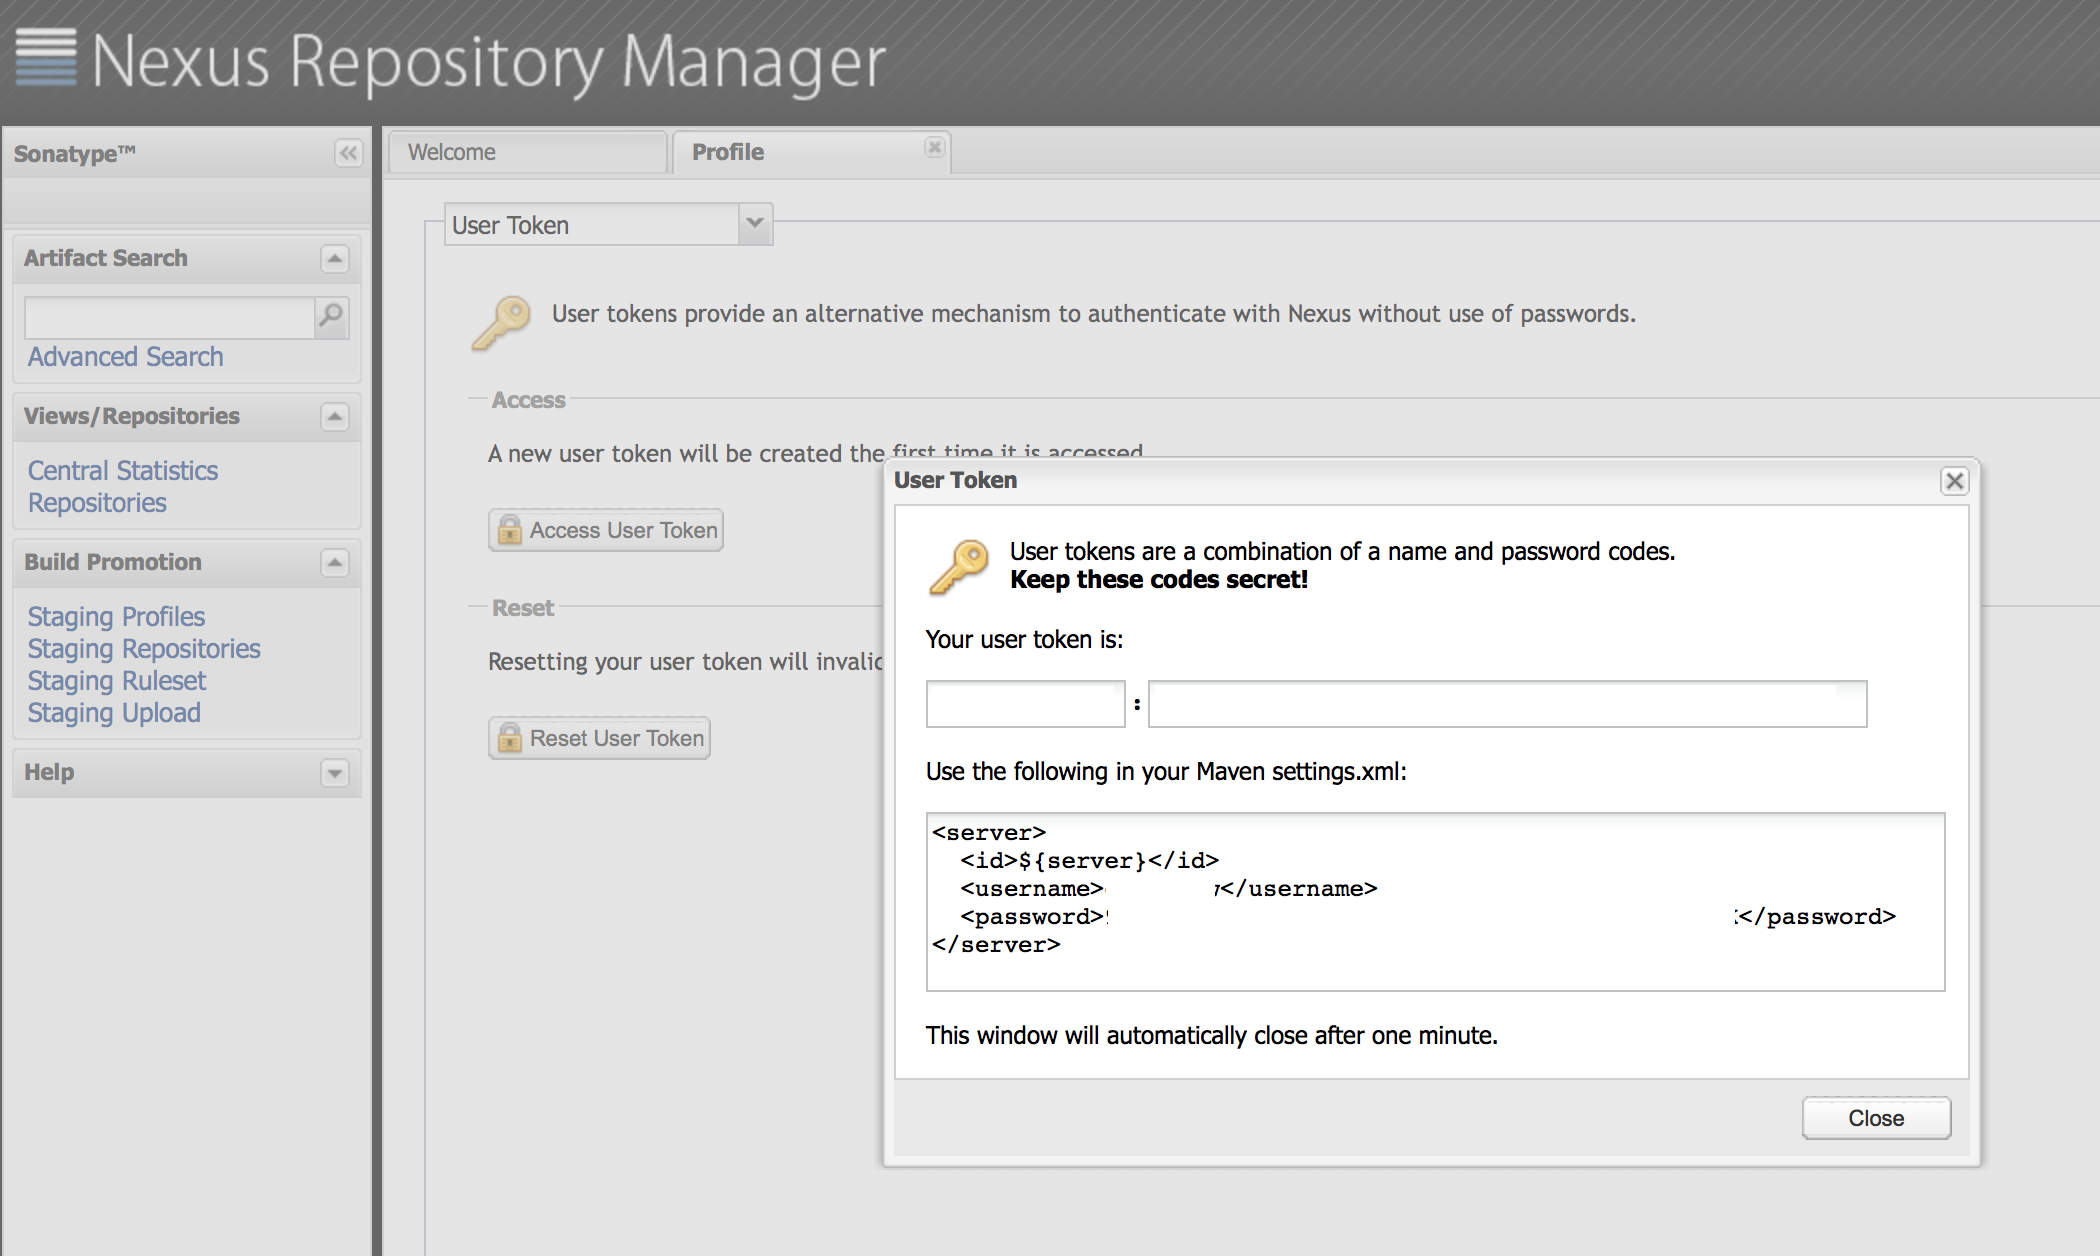
Since you don’t want your password to be written in clear text, you should generate a User Token. Head to https://oss.sonatype.org/#profile and choose “User Token” in the dropdown menu.
- Make sure the version in your
pom.xmlends in-SNAPSHOTand then
$ mvn clean deploy
Et voilà! A few seconds later your snapshot is deployed. Now let’s get to the hard part…
Step 3: Deploy your first Release
The requirements for a release are a bit tougher than those for a snapshot.
Step 3a: Beef up your pom.xml
- The version in the
pom.xmlmay not end in-SNAPSHOT - The
pom.xmlmay not contain any snapshot-dependencies - The
pom.xmlmust contain thename,description,url,license,developerandscmtags, for example:
    <name>DataMover</name>
    <description>Out of the box scheduling, logging, monitoring and data governance.</description>
    <url>https://github.com/JannikArndt/DataMover</url>
    <licenses>
      <license>
        <name>MIT License</name>
        <url>http://www.opensource.org/licenses/mit-license.php</url>
      </license>
    </licenses>
    <developers>
      <developer>
        <name>Jannik Arndt</name>
        <email>jannik@jannikarndt.de</email>
      </developer>
    </developers>

    <scm>
      <connection>scm:git:git://github.com/JannikArndt/DataMover.git</connection>
      <developerConnection>scm:git:ssh://github.com:JannikArndt/DataMover.git
      </developerConnection>
      <url>https://github.com/JannikArndt/DataMover/tree/master</url>
    </scm>
- And you may need the staging repository in the
distributionManagementsection:
<distributionManagement>
    <snapshotRepository>
        <id>ossrh</id>
        <url>https://oss.sonatype.org/content/repositories/snapshots</url>
    </snapshotRepository>
    <repository>
        <id>ossrh</id>
        <url>https://oss.sonatype.org/service/local/staging/deploy/maven2/</url>
    </repository>
</distributionManagement>
(there are so many different ways to configure the repository that I’m not really sure about this)
Step 3b and 3c: Create sources and javadoc
You must upload a …-javadoc.jar and …-sources.jar with the ….pom and the ….jar. This is a bit difficult if you write Scala code, so there used to be the option to disable this requirement on a per-project basis. The currently suggested solution is to fake it:
If, for some reason (for example, license issue or it’s a Scala project), you can not provide
-sources.jaror-javadoc.jar, please make fake-sources.jaror-javadoc.jarwith simple README inside to pass the checking. We do not want to disable the rules because some people tend to skip it if they have an option and we want to keep the quality of the user experience as high as possible.
However, being a scala dev you probably don’t fancy faking anything. scala-maven-plugin to the rescue! In the build section of your pom.xml, you probably already have used the scala-maven-plugin to compile your project. Extend it with the following executions:
<plugin>
    <!-- https://mvnrepository.com/artifact/net.alchim31.maven/scala-maven-plugin -->
    <groupId>net.alchim31.maven</groupId>
    <artifactId>scala-maven-plugin</artifactId>
    <version>3.2.2</version>
    <executions>
        <execution>
            <goals>
                <goal>compile</goal>
            </goals>
        </execution>
        <execution>                         <!-- from here -->
            <id>attach-javadocs</id>
            <goals>
                <goal>doc-jar</goal>
            </goals>
        </execution>
        <execution>
            <id>attach-sources</id>
            <goals>
                <goal>add-source</goal>
            </goals>
        </execution>                        <!-- to here -->
    </executions>
</plugin>
Now you don’t even need the maven-release-plugin, maven-source-plugin or maven-javadoc-plugin anymore!
Let’s head for the dragon…
Step 3d: Sign your name across my heart your deployables
Warning: This section contains dirty workarounds. Nothing else.
You need to provide a valid gpg-signature for the …-javadoc.jar, …-sources.jar, ….pom and the ….jar. This means these files may not change between signing and deployment. If you create them (via mvn clean install), sign them and then try to mvn deploy them, however, they will change.
Now you can try one of the many other ways to deploy, but we’ve already got so far, with javadoc and sources and everything, let’s not throw this all away!
“Vorwärts immer, rückwärts nimmer.”
(Carl Latann, unlucky musician only know for being cited by Erich “Fowler” Honecker)
First things first: Add the maven-gpg-plugin to your pom.xml:
<plugin>
  <!-- GPG signing -->
  <groupId>org.apache.maven.plugins</groupId>
  <artifactId>maven-gpg-plugin</artifactId>
  <version>1.6</version>
  <executions>
    <execution>
      <id>sign-artifacts</id>
      <phase>verify</phase>
      <goals>
        <goal>sign</goal>
      </goals>
    </execution>
  </executions>
</plugin>
This is supposedly running in the verify phase of the maven lifecycle. Or not. It means, though, that you can invoke mvn gpg:sign to create the needed .asc files.
This assumes that you have gpg installed and the gpg-agent is running. Also, you need to provide the password to your key —devil or deep blue sea— either as a console argument or in plain text in your settings.xml:
<profile>
    <id>ossrh</id>
    <activation>
        <activeByDefault>true</activeByDefault>
    </activation>
    <properties>
        <gpg.executable>gpg2</gpg.executable>
        <gpg.passphrase>iShouldNotBeInPlainText</gpg.passphrase>
    </properties>
</profile>
The manual claims that you could encrypt the passphrase, but that’s just a lie. I have spend a lot of time on this, but no success. If anyone manages to read an encrypted passphrase, please let me know!
Well, this was bad. Let’s go for the big finale…
Step 3e: Actually deploy
Okay, usually a mvn deploy goes through the complete lifecycle and does all the required steps, but we’ve added a few non-standard steps, so…well…this works:
mvn clean package source:jar gpg:sign install:install deploy:deploy
But wait, there’s more!
Step 3f: Release
Head over to https://oss.sonatype.org/#stagingRepositories and (if your prefix starts with anything after ‘c’) scroll to the bottom, where you find your repository!
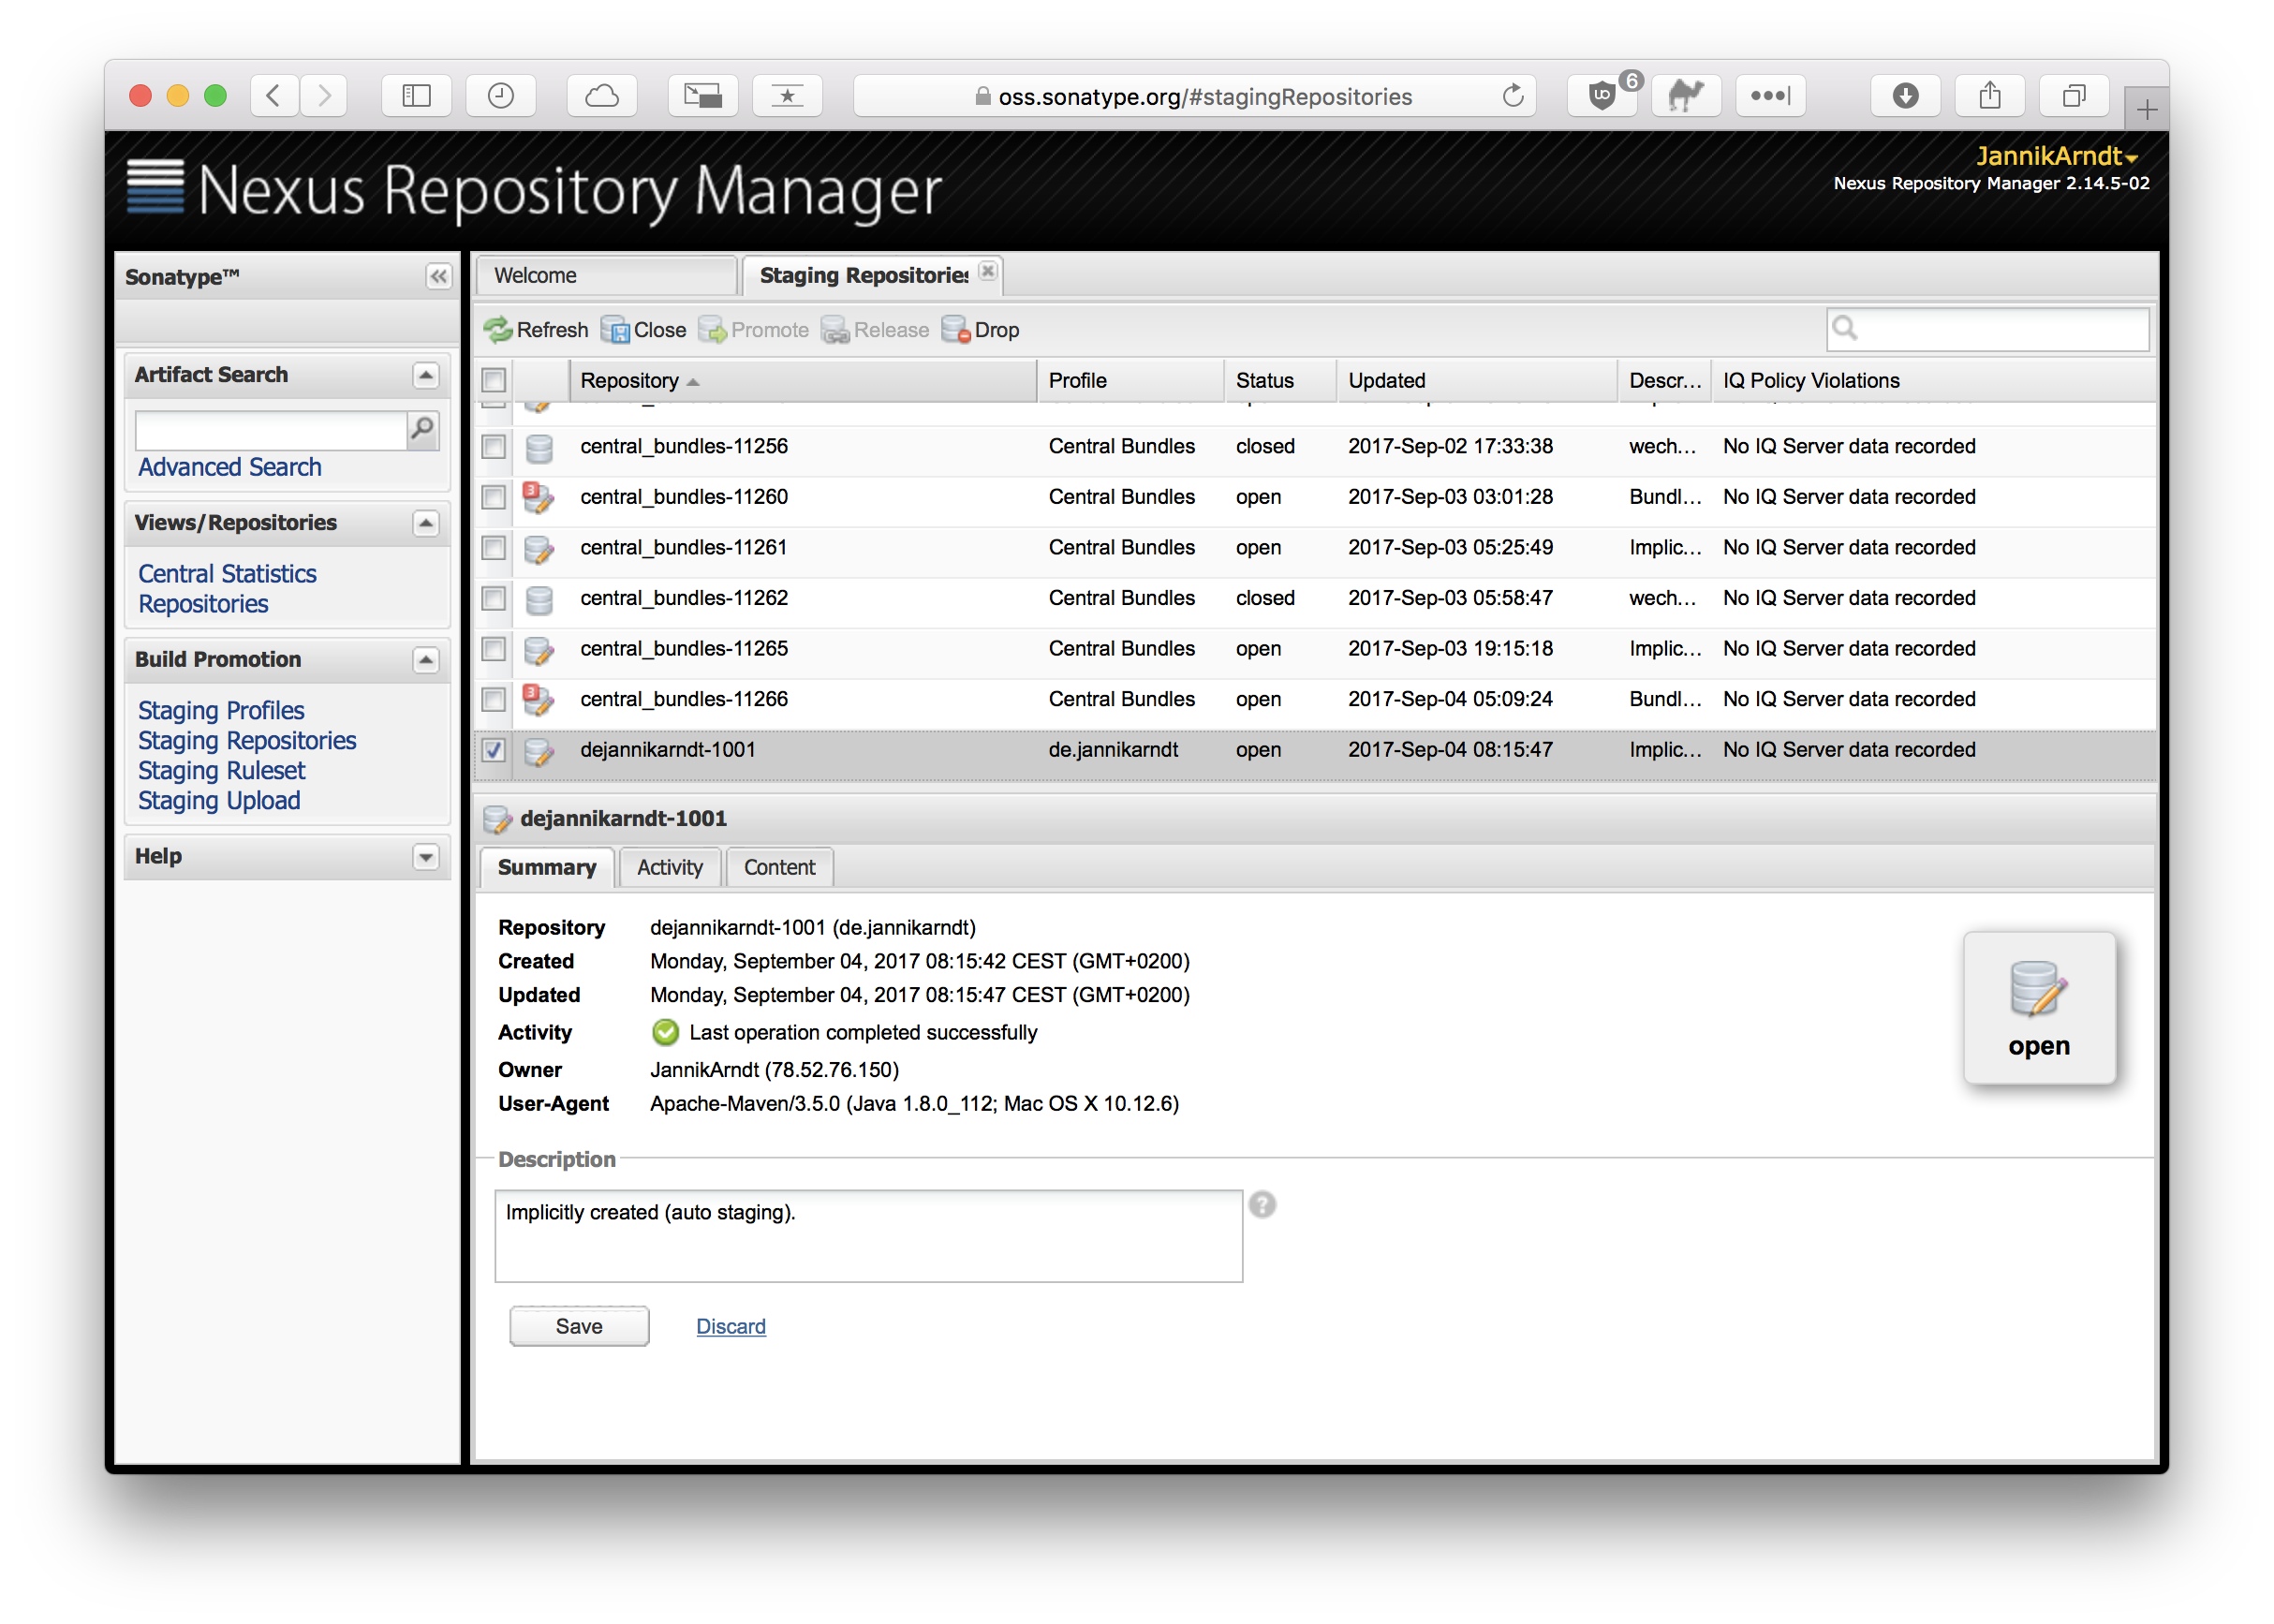
The naming is a bit weird here: The repository is now open, which means you can continue deploying into it. To move forward you have to close it. This is where you’ll get problems if you skipped a step (I told you so!).
If everything worked, you should see something like this:
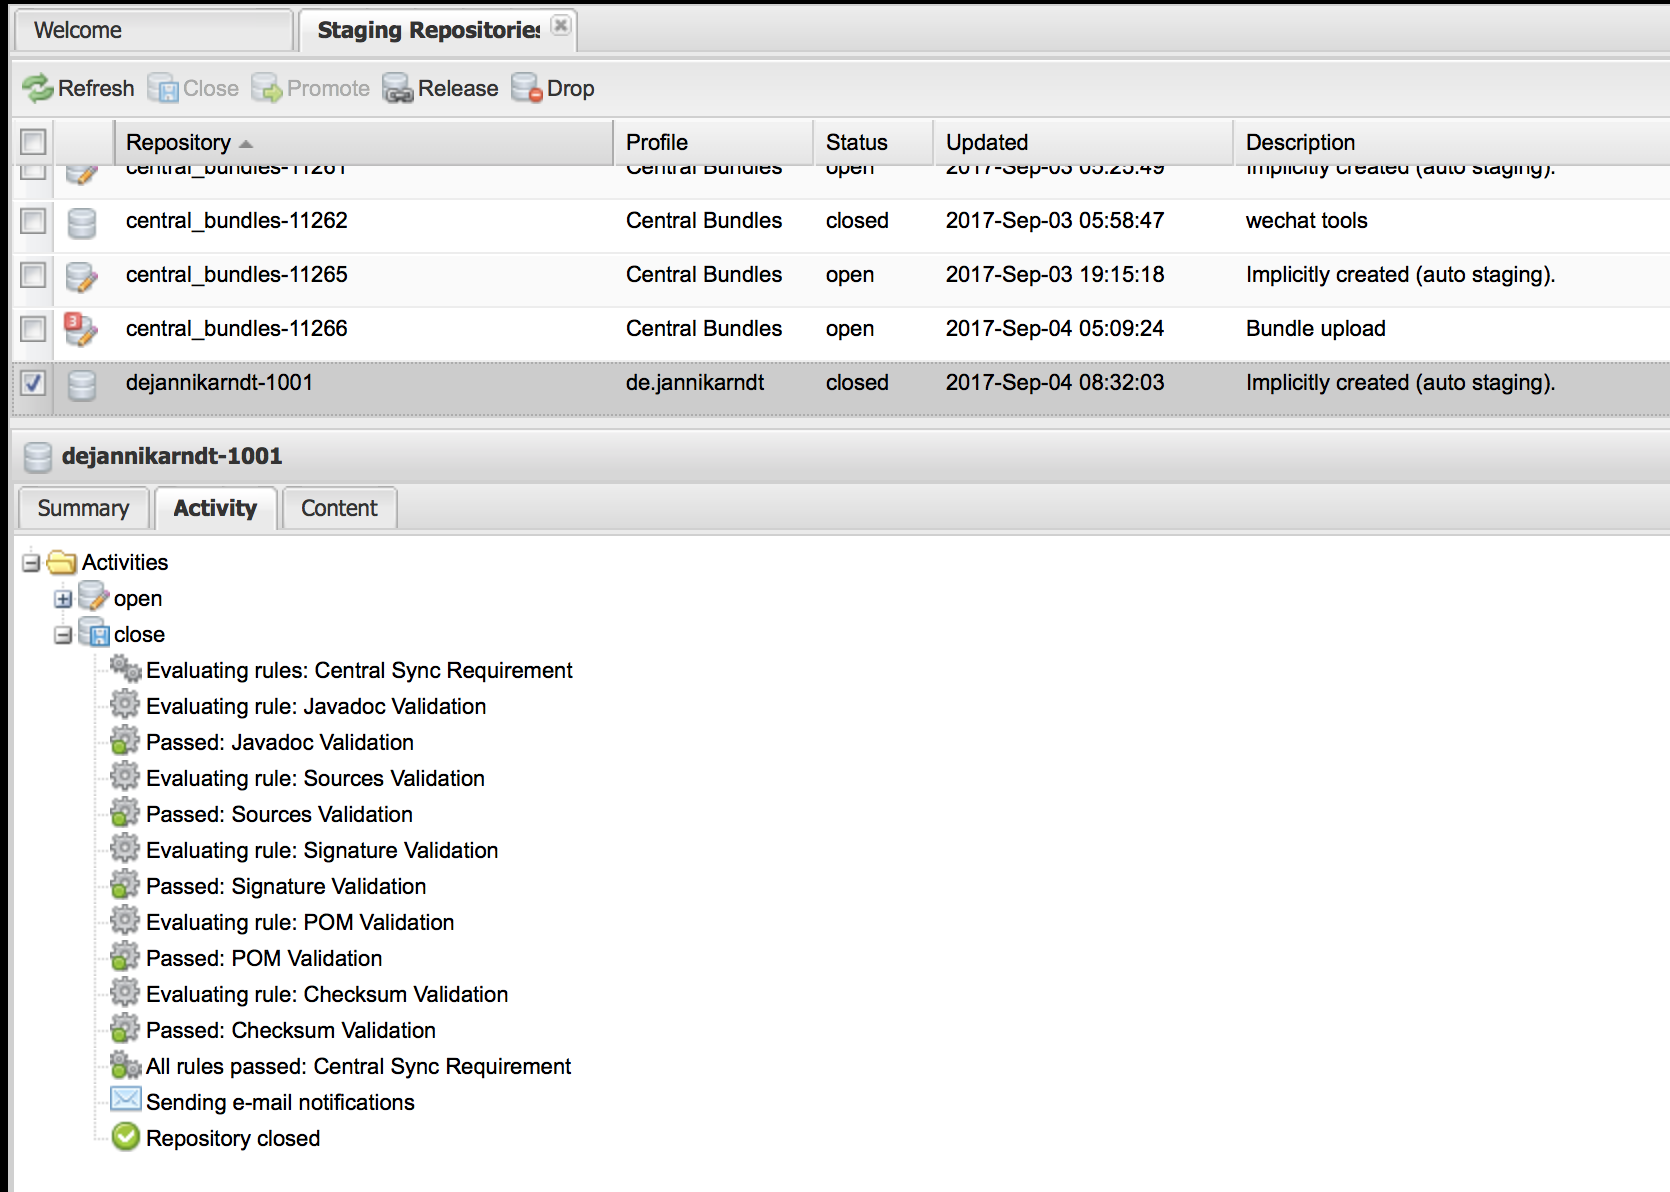
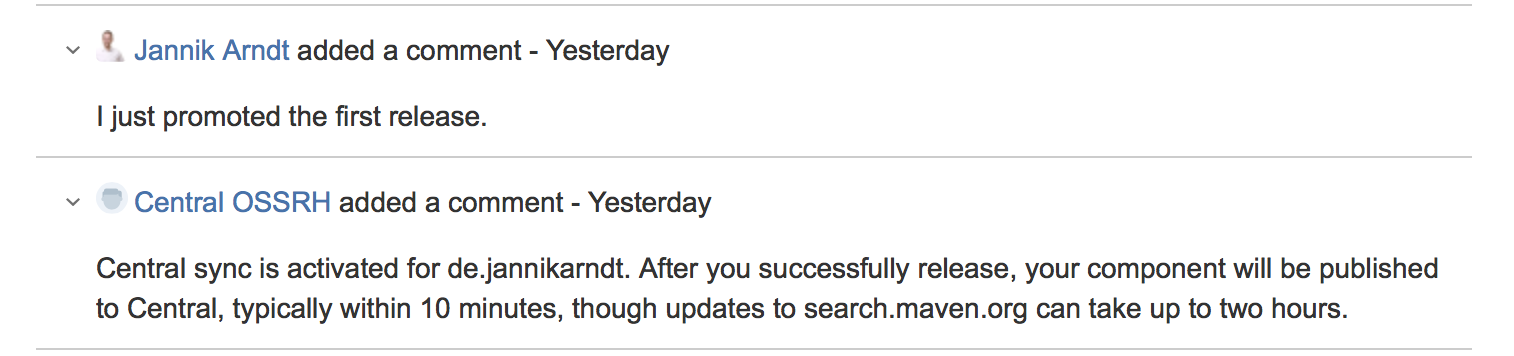
And now you can finally Release your work! Enjoy your work, give yourself a pat on the shoulder and then head back to your code, increase the version to the next -SNAPSHOT and start fixing those bugs you know are still in there…
Oh, and don’t forget to comment on the ticket, otherwise nobody will find your code: